Sunday, July 9, 2017

Update on the Bully

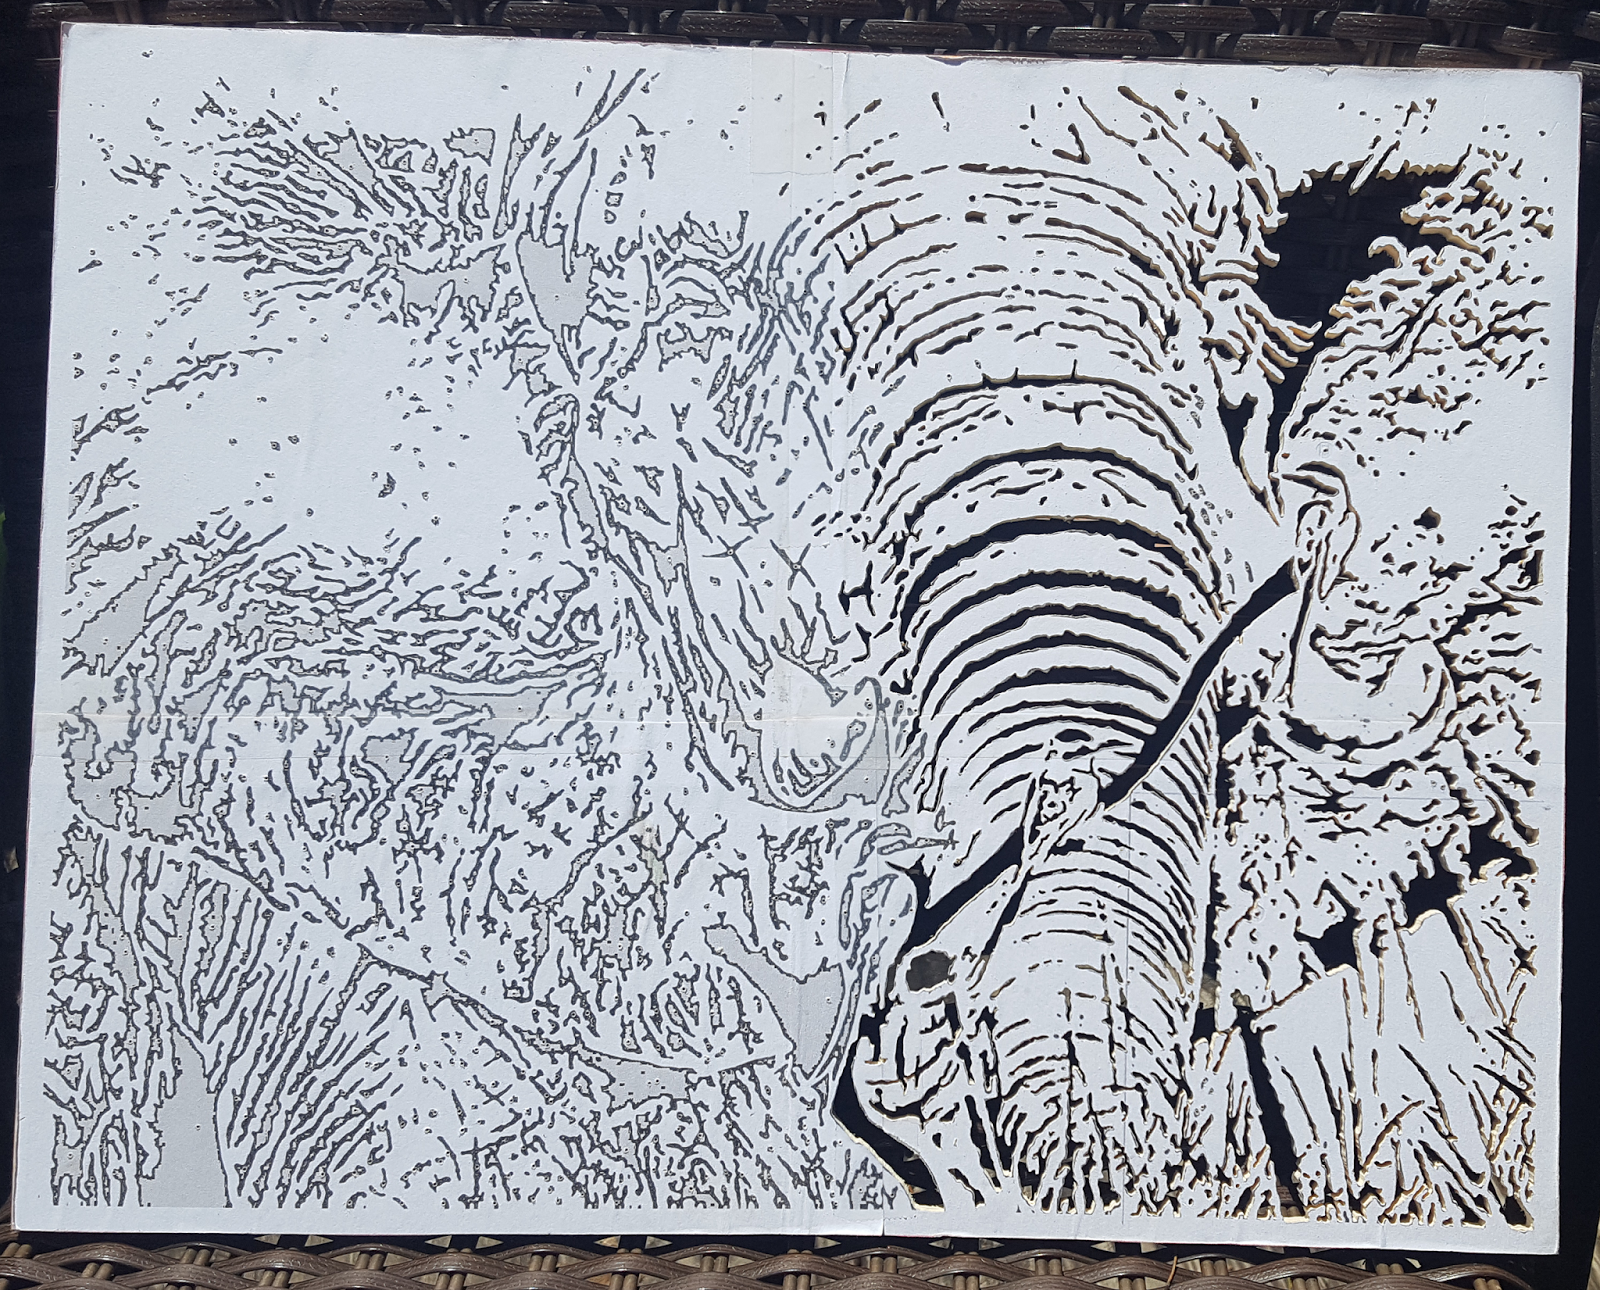
Yes, I have been cutting this off and on for over a year. So it was supposed to be last years State Fair entry but my bicycle crash put that idea on hold and I entered another project into it. It has taken me a while to get fully comfortable at the saw and now I will be working this project till it is done. Hopefully, I'll not make any major mistakes. This has quite a few internal cuts. On the really small ones it takes longer to feed the blade through the hole then it does to cut it! It looks to be just shy of 50% done. So I still have a bit of time left. Then the removal of the fuzzies from the back will take a bunch of time to do also as the spiral blades leave more fuzzies behind then the Ultra Scroll Reverse I use for non-portrait cuts. But the spirals let you in any direction and you don't have to spin it.

I find this patterns very hard to follow and the reason is that the pattern is black and so is the blade. So the blade get's lost at times in the pattern and drives me crazy. On this one I tried to change some of the pattern to gray but that does not fully work since it is a picture and not a vector graphic. It is probably my biggest gripe with pattern designers.

So maybe someday I'll go down the path of designing my own portraits so I can make them the way I would find easier to cut for myself.


Thanks for looking!

Sunday, July 2, 2017

Multilayered Dragon (Wyvern) Final

Okay so I have now glued it all up. I am happy with how it turned out. There are things that I would be more careful with doing if I were to ever do another but I probably will not do another as how many of these do I need? I added a hanger and it was slightly tricky since it has such a long tail which throws off the center of balance for this. Which makes it hang to the side  So I had to find the center of this thing before putting the hanger on the back. With such thin woods I am unable to screw or nail this so I epoxied the hanger onto it. I like the angle it hangs at.

Anyway here is the final picture of the Dragon (Really a Wyvern) I had a hard time trying to get a picture of it. The size of it kept me from really getting a good picture of it with my camera. But I do like the color of the wood. No stains this is all natural wood. It is Purpleheart (Purple), Satin (Yellowish), and Walnut (Dark Brown). The white backer is just Baltic Birch Plywood It is 4 layers on the end of the tail. This is my first attempt at choosing wood based on its natural color. I used my go to finishing of choice Danish Oil I love this stuff. It brings out the color without all the worry of runs as it is an oil with the varnish in it and it soaks into the wood and hardens the wood and brigs out the colors. It is a satin finish as it does not make it shinny. I debated on how to finish it.  But since this needed to be glued up and has so many places that would make it hard to use any other type of finish. I do not like spray finishes as I always seem to mess them up.


Hanging on the wall


The epoxied Hanger


Outside trying to get good lighting


Now I need to go and complete the Bully Elephant I started over a year ago. I started that one before the bicycle crash and that is what stopped me. But that is a fret work one with over 1,000 cuts to it and it is time consuming. I can spend a couple of hours cutting and it just seems that nothing gets done since I spend so much time putting the blade into the holes since there are so many tiny cuts in that one.

Here is that link but I have not put out any updates out since this post last year. I might have maybe 1/3 of this one done. I'll put another update out on this one soon.

Bully


Saturday, June 24, 2017

Multilayer Dragon (Wyvern) Sanded and Danish Oil applied

OK so this is really not a dragon. It is called a Wyvern. I did a little research about it and found out since it only has two legs it is not a real dragon. So to stay true to the pattern designer I am keeping the Dragon n the title.

So I have finally finished sanding it. Many little pieces and took my time. Plus like most people I find sanding tedious and boring. But it is necessary to a good looking project.  It is the hours spent trying not to take too much off because you can't put the wood back on. Also with this project you are sanding lightly so as not to break any of the pieces. Like most things I still think it could use more sanding but heck I want to finish this.

Well the Danish Oil is making the colors pop which is what makes applying a finish a good thing. Still on the fence as to whether or not I will put on another finish. If I do it will be a gel satin finish.

Anyway here are the pictures of the pieces. I now have to wait a week for the oil to soak in and dry. I've learned the hard way to just be patient. If I glue it up too fast it will warp as the two sides will dry at different rates and the wood will bend.

These are all the parts which are Purpleheart and Satinwood.


The bottom layer which is Walnut


Finally the backer which is Baltic Birch Plywood


So in another week or so I will decide whether or not I will put a Gel Satin finish on it also.

Thanks for looking!

Jim


Monday, May 29, 2017

Multi Layered Dragon

This is my latest. A 5 layer Dragon. Layers contain the following woods

Baltic Birch Plywood (Backer)
Walnut (First layer)
Satinwood (Second and Third layer)
Purple heart (Second, Fourth, and Fifth layer)

This is a Sue Mey Pattern which is available here.

This has 16 pieces. This is my first time using most of this wood and the purpleheart was by and far the hardest. So I do feel for people that use purplehart when doing intarsia as I am only cutting 1/4" thick and it wore the blade pretty quickly and I used more than I normally would have.

This is Satinwood (yellowish) and Purpleheart.


This is Walnut. As you can see in the grain that this wide board was glued up from narrow boards. But for my use it will not be noticed since most of it is covered by other pieces when done.


The last is Baltic Birch plywood.


I used both Flying Dutchmen ultra scroll reverse #5 and a spiral #3 for some of the more narrow cuts. I don't usually use spirals but I have been using them more often now since I have been working on more fret work portrait styles and those really require spirals with those very small cuts. I use them when the cuts require them.

There are 17 pieces cut and then it will be glued together. Still thinking about how to finish this off. Do I want to spray finish it? Gel finish it? Not sure. But I will decided in the next day or so.

What it looks like unfinished and just placed together it is not glued nor does it have a finish. It should pop if I get the finish right. The overall dimensions are 18" by 9"


Thanks for looking!
Sunday, April 23, 2017

Fidget Spinners Done!

OK So I completed the painting and gluing of the bearings on the three fidget spinners. The two not of my design spin nicely. My batman one is unbalanced and a little bit larger than what my fingers are capable of spinning freely so it pretty much is constantly touching my skin as it spins so it slows down rather quickly compared to the other two. The fact that the bearings are unbalanced means I can't just let it spin on one finger as it will just fall off if I lift up one finger. Hey, it is my first one that I took the shape and placed the bearings. So I learned what I did wrong and if I do another batman I will tweak the design to make it be able to spin and not touch the skin and be balanced so that I can spin it on a single finger.

There is a video of all three being spun and you can see what they are and believe it or not I do find the act spinning them entertaining. I don't know what it is but it does keep your mind busy and I don't sit there fidgeting or shaking my leg.


The video showing these in action